Ok everyone, today I am going to break from tradition to tell you about a new culinary experience I had at a recent ranch party. At this party, several college students from New Orleans decided to smoke a 10 pound shoulder of pork. Everyone at the party was skeptical of their capabilities, yet they perservered despite this lack of faith. These students smoked the shoulder for 10 hours, re-braising it every 30 minutes. The result was the most delicious home cooked meat I have ever tasted. Here's the basic recipe. Unfortunately you need a smoker for this one, which is usually about a 180 dollar investment. Nonetheless, I'd say it would be worth it.
Required Items:
- Smoker
- Hickory smoking chips
- a braising brush
- rosemary
- cayenne pepper
- brown sugar
- vinegar
- 10 lb pork shoulder (can buy from Wal-Mart)
- parsley
- Worchester sauce
- soy sauce
- and a pinch of dirt for that earthy taste (definitely optional, this addition was made when one of the college guys dropped a mixture on the ground and proceeded to use it as a braising sauce.
Step one: Make a mixture of the rosemary, cayenne pepper, parsley, Worchester sauce, and brown sugar. Add some water. Make a second mixture with the rosemary and parsley, and soak the wood chips for half an hour.
Step two: Spread the first mixture over the pork shoulder generously, before sticking it into the smoker.
Step three: Stick the soaked woodchips into the smoking tray, and the left over water in to the tray adjacent to it.
Step four: begin smoking the meat, re-braise every 30 minutes. Do this for 10 hours (or an hour for every pound of meat)
Step five: After the 10 hours, take the meat out and let it cool for 20 minutes.
Step six: Once the meat cools, shred it up with two forks. It should be tender enough to melt away at the touch.
Step seven: make a sauce using the cayenne peppers, water, parsley and vinegar, place it on the meat, and eat to your heart’s content. It also tastes great as sandwich meat.
Wednesday, May 5, 2010
Wednesday, March 3, 2010
Stuffed Mushrooms (appetizer 2-6 people)
My sister makes these and they are delicious. Awesome for appetizers, especially at a southwestern style dinner. Sorry for the absence of pictures, for some reason my computer did not load them properly. I will fix that soon.
Ingredients:
-12 small portobello mushrooms
- Vegetable oil
- Tbs of minced garlic
- 1 package of cream cheese
- Ground pepper
- An onion
- Cayenne pepper powder
- Parmesan cheese
Step one: Ok, for this one we need an oven, so hopefully you have access to one somewhere on campus. Also, you are going to need a baking tray and a some cooking spray. First thing to do is preheat the oven at around 350-375 degrees.
Step two: Clean the mushrooms and cut out the stems so that they become like small edible bowls.
Step three: Dice up a half of an onion and stir fry it with the garlic on the Presto Skillet (or normal skillet for those with that option). Remember to add the garlic a couple minutes after the onions since garlic burns quicker.
Step four: Take the garlic and onion off the skillet, and mix it with the black pepper, cayenne pepper, cream cheese, and a little bit of parmesan.
Step five: Put a spoonful or two of the mixture into each of the portobello bowls.
Step six: Put the stuffed bowls on the tray (after you've sprayed the tray) and bake them in the oven for 15-20 minutes. They should be ready when the mixture becomes slightly browned on the outside.
Next, take them out, prepare them all nice and tidy-like, and enjoy the delicious gourmet dish.
Discover Simple, Private Sharing at Drop.io
Thursday, February 18, 2010
Puppy Chow
Alright, this ones an easy recipe and it doesn't require any cooking equipment besides a microwave and a fridge.
Ingredients:
- half a cup of peanut butter
- 1/4th a cup of butter
- 1/2 table spoon of vanilla
- 9 cups of cereals like wheaties
- 1 1/2 cups of powdered sugar
- 1 cup of chocolate chips
Step one: mix peanut butter, butter, and chocolate chips and microwave for a minute and then add the vanilla and stir.
Step two: put your cereal in a bowl and pour in the mixture. Stir well until its evenly spread on the cereal.
Step three: put the new concoction into a bag and add the powdered sugar. Shake the bag for about a minute and put it in the fridge for an hour or so.
Step four: eat the deliciousness in front of jealous friends and neighbors.
Sunday, January 31, 2010
Fried Rice (serves 3 people)
Note: All of these directions were created by me experimenting with several recipes. If something doesn't sound tasty to you, I encourage you to do a little experimenting of your own. This recipe, however, has served me well so far. Every time I make it, the smell wafts out to the hall and my dorm buddies gather in hopes of having some. The ingredients are also fairly cheap considering the amount you can make.
Ingredients needed:
- Olive, vegetable, or sesame oil (depending on personal preference)
- An onion
- A couple cloves of garlic
- Rice (short grained is preferred)
- 2 eggs
- A jalepeno (optional)
- A small amount of fresh ginger (optional)
- Some link sausage
- Frozen mixed vegetables
- Copious amounts of soy sauce
Step One:
First I like to get my rice cooked before everything else. If you don't have a rice cooker, you are going to have to boil it. To do this put a cup of rice in a pot. A nice trick to give the rice some extra flavor is to lightly cook it dry in the pot with some oil before adding the water. After this, put 1 1/2 - 2 cups of water in the pot. If you are using the Presto Skillet like me, crank the temp up to its highest setting and prepare for a 10-15 minute wait. It is important that you keep an eye on the rice to make sure that it is cooked right. If you leave it boiling for too short the rice is crunchy and not very edible, if you boil it for too long it becomes sticky and gross. Check rice texture routinely until it tastes right.

Step Two:
Now, cut up half of an onion into pieces a little larger than a square centimeter. Finely dice the garlic, one jalepano, and a pinch of ginger. The jalepeno is an odd fusion twist but it can give the rice a bit of a spicy kicker. If your frozen vegetables are large, you may want to cut those up a bit too. Last of all cut a 5in piece of link sausage into pieces that are about the same size as the chopped onions. Once again, the sausage is a bit of a fusion ingredient, but its tasty. If you are looking for more traditional fried rice, you can use chicken instead.

Step Three:
First cook your sausage bits until they are a little crunchy. If your sausage is not precooked, make sure that you cook them extra well done to ensure that all the potentially harmful bacteria is cooked out.
First cook your sausage bits until they are a little crunchy. If your sausage is not precooked, make sure that you cook them extra well done to ensure that all the potentially harmful bacteria is cooked out.

Step Four:
Next, use a spatula to get all of the grease off of the skillet by forcing it into the draining tray. After that, put some oil on the skillet and spread it out with the spatula. Sauté the chopped onions at a temperature of around 275 until they are a little bit clear and less crunchy.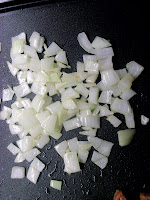
Next, use a spatula to get all of the grease off of the skillet by forcing it into the draining tray. After that, put some oil on the skillet and spread it out with the spatula. Sauté the chopped onions at a temperature of around 275 until they are a little bit clear and less crunchy.

Step Five: Next add the mixed vegetables, garlic, ginger, jalepenos, and sausage. Let these vegetables cook for several minutes, but stir periodically to make sure they do not burn.

Step Six:
Add the rice and stir it for several minutes until all of the ingredients are mixed in well. Try to break up all the clumps of rice with a wooden spoon or your spatula.
Add the rice and stir it for several minutes until all of the ingredients are mixed in well. Try to break up all the clumps of rice with a wooden spoon or your spatula.

Step Seven:
Using the spoon or the spatula, move the rice into a donut-like shape (as indicated in the picture to the right).

Using the spoon or the spatula, move the rice into a donut-like shape (as indicated in the picture to the right).
Step Eight:
Increase the temperature to 350 and pour two well stirred eggs into the hole of the donut shape.

Step Nine:
Wait a minute or two until the egg forms a solid cooked bottom but still has a runny top. Cave in the hole and mix the rice with the egg. Stir well so that the runny part of the egg spreads around to all of the rice. Cook and stir for several minutes until the rice becomes slightly brown.

Step Ten:
Lower the temperature to 200 and add generous amounts of soy sauce while stirring. Taste test regularly to find how much soy sauce you like in your rice.

Step Eleven:
Once you have added enough soy sauce to suit your tastes, turn off the skillet and prepare yourself for a delicious meal.
Once you have added enough soy sauce to suit your tastes, turn off the skillet and prepare yourself for a delicious meal.

Friday, January 15, 2010
Getting Started
Ok my hungry friends, lets get started! Now, if you have access to a kitchen in a dorm you are extremely lucky and you can disregard all of the following information. If, however, you are like me and you have no access to a kitchen, then we have to fix that as soon as possible. First, the most important item of dorm cooking (personal opinion) is the electric heating griddle. The Presto Tilt'n Drain Griddle is a perfect item, you can use it to sear, sauté and even boil things.
 It is also fairly cheap, I bought mine for $34 at Walmart, but there is also a smaller version for $20. You can see a picture of this griddle in the picture to the right. Other essentials are a big pot, some wooden spoons, a spatula, a vegetable knife, a cutting board, a measuring cup, basic seasonings such as salt and pepper, and some cooking oil. It would be good to have some more advanced spices such as powdered garlic, dried cilantro, cumin, and basil, but those are not absolutely necessary if you are running on a tight budget.

All of this stuff is a little expensive, but Walmart can sell you pots and pans for about 10 bucks each, 4 wooden spoons for a dollar, ect. So all told, making your own kitchen may cost from 50-60 dollars. This may seem pretty expensive for the average college student, but it is totally worth it. On the picture to the right, I put up my own kitchen set up. In all honesty, I think it was the best investment I have ever made. People are lured to my room by the aromas that spread into the hallways, and I get to feel like a wicked cool chef. Also, the cheap and delicious meals are another bonus that I frequently enjoy. Now I cook almost half my meals in my own room.
 It is also fairly cheap, I bought mine for $34 at Walmart, but there is also a smaller version for $20. You can see a picture of this griddle in the picture to the right. Other essentials are a big pot, some wooden spoons, a spatula, a vegetable knife, a cutting board, a measuring cup, basic seasonings such as salt and pepper, and some cooking oil. It would be good to have some more advanced spices such as powdered garlic, dried cilantro, cumin, and basil, but those are not absolutely necessary if you are running on a tight budget.
All of this stuff is a little expensive, but Walmart can sell you pots and pans for about 10 bucks each, 4 wooden spoons for a dollar, ect. So all told, making your own kitchen may cost from 50-60 dollars. This may seem pretty expensive for the average college student, but it is totally worth it. On the picture to the right, I put up my own kitchen set up. In all honesty, I think it was the best investment I have ever made. People are lured to my room by the aromas that spread into the hallways, and I get to feel like a wicked cool chef. Also, the cheap and delicious meals are another bonus that I frequently enjoy. Now I cook almost half my meals in my own room.
Subscribe to:
Posts (Atom)